Whiskey Bottle Makeover Challenge
I'm a huge advocate for making things yourself while still being able to budget and get it done frugally. I buy my supplies when I have coupons and stock up on things that I know I will use in the future. I always check what I have before I make a purchase!

This "tutorial" is less about what I made and more about showing you how to use supplies you already have on hand to make the final product you had in mind. You don't need to spend money to make new projects. Be inspired by what you have! You would be surprised by all of the things you can make if you take a look at all the craft stuff you have saved up. (Unless this is your first craft, then you might need to buy a couple of things.)
So, let's get into it!
Lately I've been really drawn towards colorful vases. They're all over the home decor section of Pinterest! I've kept my eye out for cute vases in the stores, but haven't found any that I really love and that fit my budget! That's when I decided to use some old glass bottles that I already had and make my own.
Using what you have.


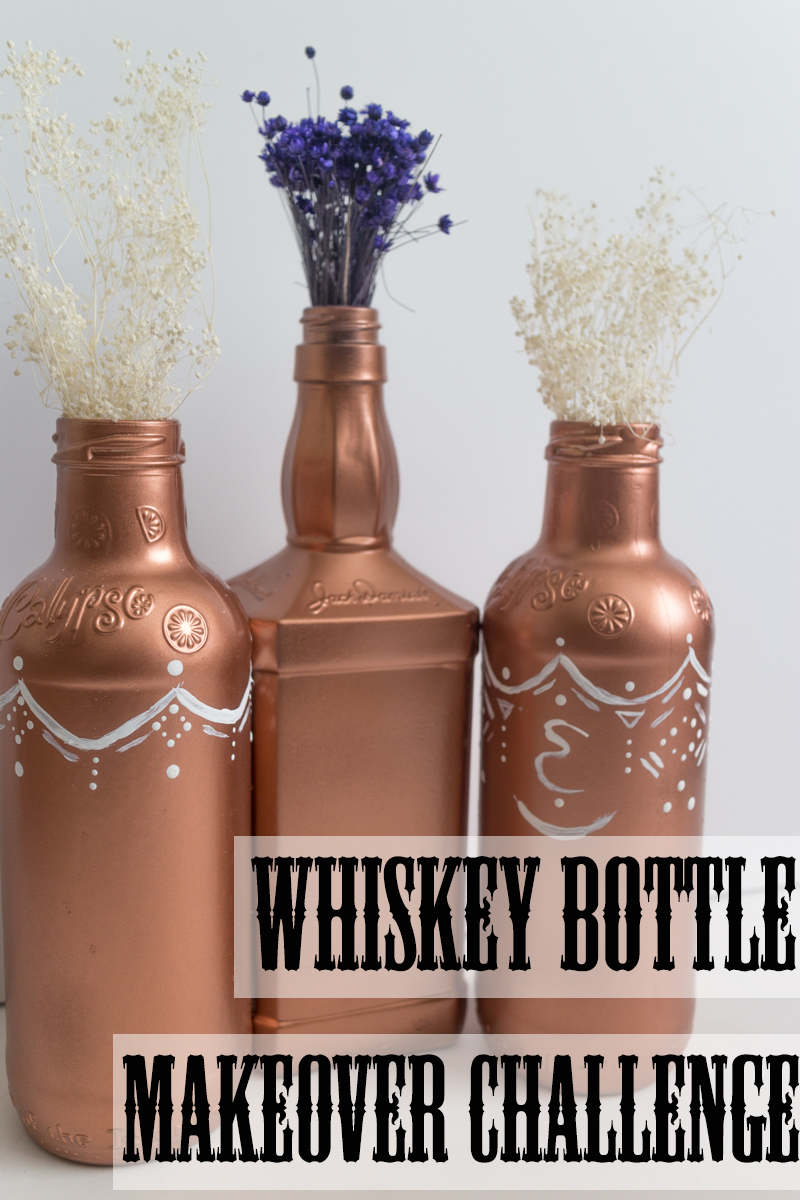
I had an old bottle of Jack Daniels from a couple months back that I kept because I liked the shape. I knew I would be able to do something with it eventually! Like a lot of things that I talk myself into keeping, I stored it away and completely forgot about it until I had this idea in mind. Sometimes my faults benefit me in the long run, sweet!
I got my whiskey bottle and two others that I thought would make cute vases and spray painted them using a copper spray paint that I recently bought for a post that will be coming up very soon!
Thinking outside of the box.

I was very happy with the way the paint color turned out, but decided to take it a step further! A lot of these vases I've seen online had cool designs and shapes painted on them. Well, lucky for me I'm an acrylic paint hoarder! I got out my white paint and started doodling and dotting on the two matching "vases" until I came up with a design I enjoyed.
Most of us have some color of acrylic paint stashed away, use whatever colors you have on hand! This whole project is meant to cost you little to nothing.
Remember hidden treasures.

Now that my vases were painted to my liking, I needed flowers! Remember the post I did a few months back with the twine mini vases? (You can find that tutorial by clicking here if you haven't read it already.) I had some dried flowers left over from that tutorial that I thought would go well with the color of the vases!
I was literally just going to throw them away during my last cleaning spree! Good thing I didn't.
I didn't need to go out and purchase a single thing for this project. Everything I used I already had on hand or has been used in different projects that I have made.
I challenge you!
To make your very own vases, using your very own supplies. Your vase shouldn't look exactly like mine unless you have all of the supplies I used. Don't go out and buy anything extra for this project.
Don't have a glass jar or bottle? Not a problem! Use that old plastic coconut oil jar or that can of tomato sauce you were planning on throwing away after tonight's dinner.
I'm sure you have paint somewhere stashed away too. You don't even need spray paint, use acrylic paint if thats all you have. Only buy paint if you have literally none or are planning a project that will involve paint in the near future. If that's the case, use your coupons to buy some!
Click here to see the metallic spray paint I used and click here to see the white acrylic paint I have on hand!
The flowers for my vase were an added bonus. Maybe you don't keep dried flowers on hand (that is something kinda random to have stashed away). Use ribbon or washi tape to add something extra to your vases. Even go out to your garden (if you have one) and pick some fresh flowers.
The point of this project
Is to use what is around you. I used to spend so much money on my crafts. I then realized my hobby doesn't have to cost me a butt load of money. It can be enjoyable without breaking the bank.
If you accept this challenge
Let me know in the comments below! If you make something of your own, head to my about page and send me a quick email with a picture of what you came up with! I would love to see it.
If you enjoyed this project, feel free to subscribe in the box below or in the NEWSLETTER tab at the top of the page!
Love & light.
Disclaimer: This post contains affiliate links. Simply put, IF you choose to purchase through the links I provide, I may receive a small portion of the sale.


