DIY Stamps From Dollar Store Erasers
Most of us have those little pink erasers laying somewhere around our homes. (Don't pretend like I'm alone on this one!) Whether you're in school, working or have kids of your own, chances are you're with me on this.
I've kept a lot of little erasers laying around for who knows what reason. I don't even really use pencils much anymore so these little erasers are becoming less and less relevant to my daily activities.
Luckily, I have a tendency to find multiple purposes for most of my belongings. I hate calling things "irrelevant" so I choose to repurpose them and give them relevance again!

Gather your little erasers because today they're getting promoted in their purpose! I'm going to show you how to take your old, dirty erasers and turn them into new fun stamps!
You're not going to want to miss this, they're perfect for the upcoming holidays!
Here's what you'll need:
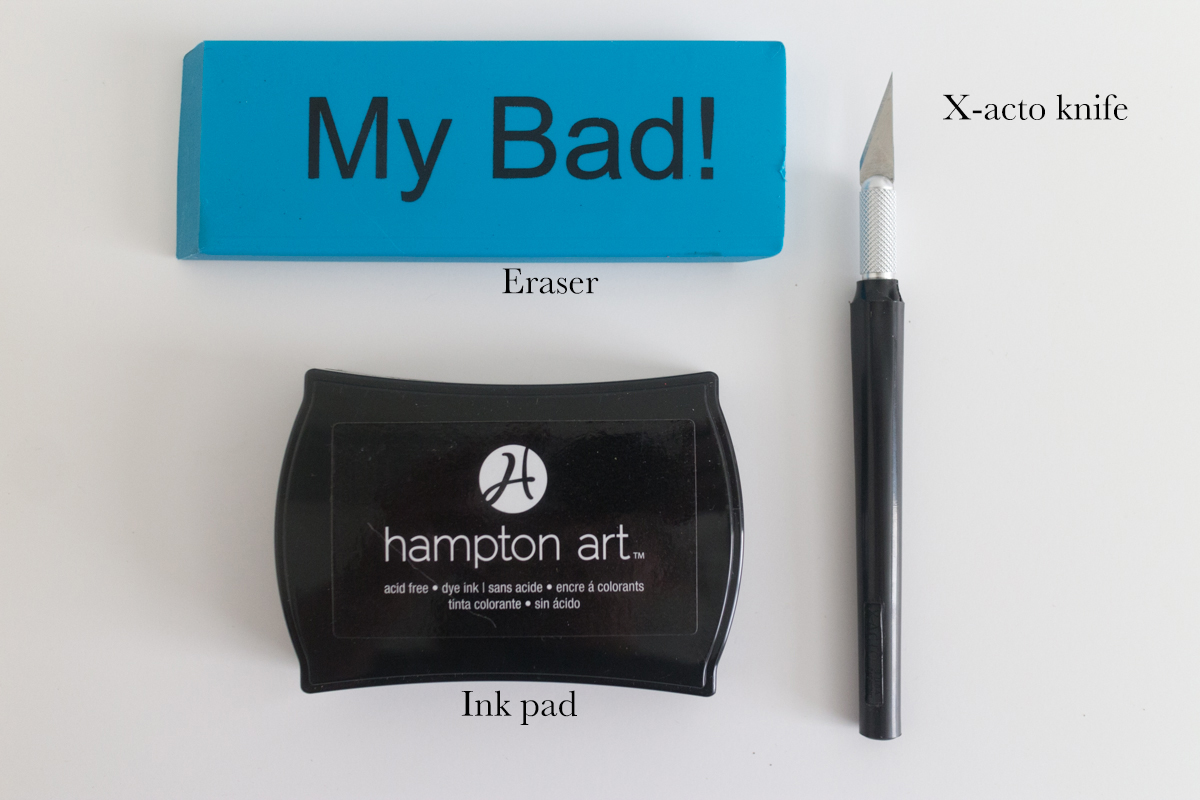
- An eraser. I bought this new one from the dollar store because I'm fancy! But just use whatever old erasers you have laying around your house!
- An x-acto knife or some sort of knife to carve out your designs.
- An ink pad.
- Extras I ended up using but are not pictured: Birch blocks, hot glue and a sharpie.
Getting started:

Since I had a pretty large eraser, I went ahead and cut it into smaller pieces about an inch wide. Your x-acto knife should cut right through the eraser, making this relatively easy. Since I will be making shapes out of these smaller bits, I didn't worry too much about cutting straight lines.
My big eraser yielded four sections. I decided to cut my smaller parts again, this time in half to make them thinner. This will make it easier to cut precise edges when I'm read to form my shapes.
If you have the standard pink school erasers, you might want to consider cutting a centimeter or two off of the thickness. This really helps to keep your lines precise when you're cutting out your shape!
Before you cut:

I strongly recommend drawing out your shapes and designs with a sharpie or some other marker before you actually cut them out. This way you're going into it with a plan and not having to freehand the entire thing.
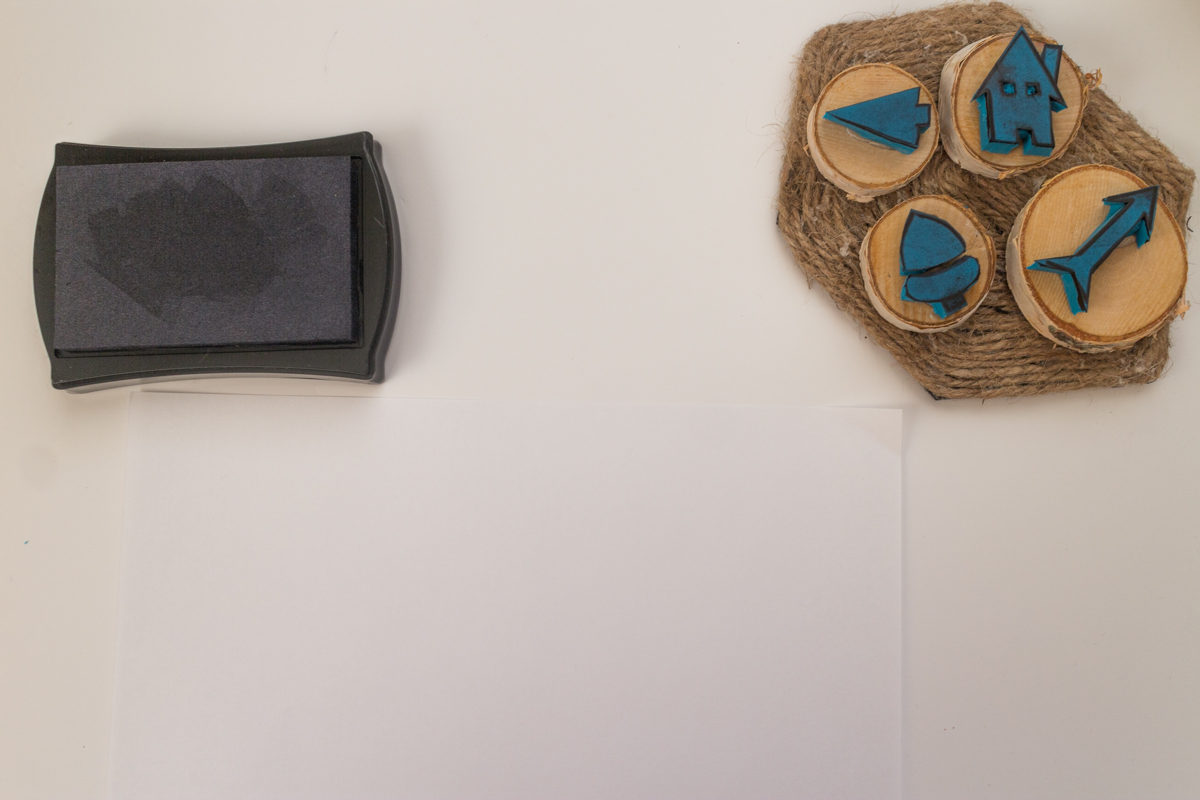
I am so glad I chose to draw my shapes out first. I know this project would have been an epic fail if I hadn't. As you can see the four designs I chose were a tree, a house, an arrow and an acorn. The possibilities are endless with your designs! Clearly I am no drawing expert, but the "2nd grade drawing" vibes my designs give off made me happy in the end. Sometimes imperfection leads to the most unique end result.
If your shapes are pretty simple, like circles and squares, go ahead and skip this drawing step.
Creating the stamp:

Now it's time to cut out your shapes using your knife. Take your time and don't rush through this step. You want to make sure your lines are precise. This is why drawing a shape beforehand really comes in handy. It will act as a guideline so you can see where you're cutting.
Rounded edges are the hardest to cut accurately, so really make sure you take your time on these parts especially.
For my house design, I dug small bits out of the windows. I didn't have to cut all the way through because I knew that carving out a small indent where I wanted the windows to be would create the negative space I was looking for when it came to stamping.
The more detail your design has, the more time, effort and caution you will need to take while cutting it out. Simple designs are way easier to do for this project, especially if it's your first time.
Try to stick with straight, solid lines and minimal detail. Unless you're feeling crazy, then just go for it!
Added bonus:
I originally planned to keep my stamp just the way it was but decided in the end to add an extra finishing touch.
I have these birch discs that I plan to use for an upcoming project. I glued the stamp to the disc for added support when I'm using the stamp. This way there's even pressure and the stamp is easier to use.
If you don't have any discs like this on hand, try using small bits of cardboard from old boxes. It's cheap, easy and get's the job done just as well!
Stamp your heart out:


I'm so happy with how my little stamps turned out. They're cute and imperfect and I love it. These can be used for so many different projects for years to come. They're perfect for invitations, scrapbooking, holiday decor and much much more. Make sure you check back in two weeks to see what I ended up using these little stamps for. Hint: My Christmas tree appreciated it!
Make sure:
To subscribe below or in the NEWSLETTER tab above so that you are updated whenever I post a fun, new diy project.
Also- The second week of December I will be doing a Christmas ornament takeover, so make sure you subscribe so you don't miss out on that!
I hope you loved this tutorial and found it useful. I will talk to you again next week!